Thursday, November 19, 2009

Homemade Vegetable Stock

If you spend a few minutes looking around this blog, you might notice I make a lot of soup. Not only that, it seems like every recipe I make - be it soup or rice pilaf or you name it - requires chicken or veggie stock. This week, as I am planning my Thanksgiving preparations I realized I will probably need stock for just about everything I plan on making.

In the US, it never even occurred to me that I could make my own - it was just too easy to pick some up at the store (regardless of the extra cost) and I never really put any thought into the benefits of making my own - or the harm in buying it pre-made. Pre-made stock here is rare and expensive in Germany, so when I moved here I really had little choice but to figure out how to make it myself. Turns out, making stock at home is ridiculously simple and easy. I struggled the first few times I made it - it would be bland or watery - but I finally figured out exactly what works best.
Making your own stock means you get to control what goes in it - the types of vegetables and seasonings as well as the amount of sodium and fat. I have almost always preferred to use vegetable stock instead of chicken stock because it is lower fat, lower sodium and doesn't require consumption of an animal that is already grotesquely over-consumed. This broth is completely fat free and can be totally sodium free as well, if you choose (I chose to just add about one teaspoon of salt to the whole pot). It packs a ton of strong roasted veggie flavor - just like the stuff I used to buy at the store - and it cost me roughly 3 euros for eight whole cups of stock. Um, hello I used to pay 4 bucks for half that amount!!


Homemade Vegetable Stock

12 cups water
about 2 tsp fresh ground black pepper
1 red bell pepper
1 kilo carrots, chopped and not peeled
1 large yellow onion, quartered
1 large purple onion, quartered
1 lb/large bunch celery, coarse chopped (leaving the tight little leaves on)
5 or 6 cloves garlic, peeled and cut in half
2 bay leaves
pinch mustard seeds
salt

Put all the cut up vegetables (I don't roast the garlic, but that is up to you) in a roasting pan and roast in the oven for about 30 minutes at 400 F/200 C - until carrots just start to caramelize and peppers are just starting to get black spots (you don't want them overly charred, just barely roasted).

Remove from oven and transfer to a large stock pot. Add the garlic, black pepper, bay leaves and mustard seeds and a pinch or too of salt (optional).

Cover with the water then put the lid on the pot and bring to a boil. Reduce heat to medium and allow to boil/simmer for around one to one and half hours.

Strain through a fine-mesh strainer (or through cheesecloth if you want a really clean stock). At this point I will reserve the carrots to use in dog food (taking care there are no onions mixed in with them)(I can't stand letting any food go to waste). Let it cool and transfer to containers to freeze - I generally will freeze in one cup increments in small plastic containers, though sometimes I will do 3 or 4 cups in one since this is a good amount to defrost for soup. Make sure and label it, 5 months from now you might not remember what it is (though mine never lasts that long).

This recipe yielded me 8 cups of good strong vegetable stock.

Thursday, November 12, 2009

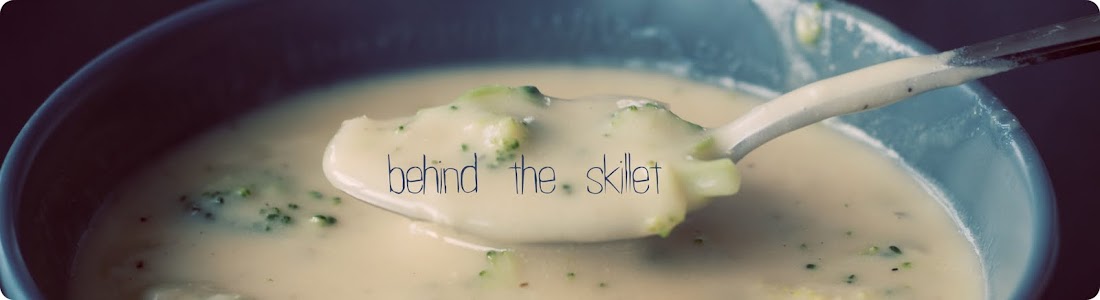
Classic Broccoli Cheddar Soup

Its amazing to me, even now, that I even wanted to make this soup - never mind the fact that I had been seriously craving it ever since we had our first snow (whimper) and never mind the fact that I absolutely loved it. Cause see - I used to hate broccoli, and I used to especially hate this soup.

As an adult, I have come to appreciate broccoli - even love broccoli. At some point in time, I even came to love Broccoli Cheddar soup. I think the first time I really gave it a chance was during my summer working at Quiznos. You would think having to take large frozen containers of this soup and defrost it every morning and stir it every hour and serve it to a million and one people would actually make me hate it. But somehow it had the opposite effect and my horizons were broadened (I know I know, at a fast food restaurant!).

Of course, I have since learned that Broccoli Cheddar Soup can be a million times better than that stuff I had to take out of the freezer every morning, and it doesn't have to be complicated either. This soup is absolutely perfectly delicious. Not only that - it is super simple to make and doesn't have any heavy cream or "real cheese" (as we lovingly call the blocks of processed gooey orange stuff). It is filling and comforting and only requires a few inexpensive ingredients, which might just make it the perfect comfort food.

Broccoli Cheddar Soup
1 head of Broccoli (approx 500g) chopped into very small florets
2 to 4 Tbs butter
1 medium onion, finely diced (about 2 cups diced onion)
3 garlic cloves, finely minced or pressed
salt and fresh coarse-ground black pepper
4 cups chicken or vegetable broth
1 1/2 cups low-fat milk (I used 1.5 percent)
1/2 cup flour
3 cups Sharp Cheddar Cheese, finely shredded (do not use pre-shredded cheese!!)

In a heavy stockpot, melt the butter on medium heat. Add the diced onion and a couple pinches of salt and saute until the onions are very tender and just beginning to brown - around 10 minutes.

Stir in the garlic and plenty of black pepper and let cook for about one minute. Stir in the broccoli and let cook for another minute or so.

Add the broth and raise heat just a tad, stir well then cover and let come to a slow boil. Let simmer, covered, for around 5 to 10 minutes or until broccoli just starts to become tender.

Whisk the flour into the milk, making sure no clumps or grains remain. Slowly stir this into the soup. Reduce heat to medium-low and continuously stir until soup has gotten nice and thick - around 3 to 5 minutes.

Reduce heat again, to low, and stir in the cheese by the handful, stirring until all the cheese is melted into the soup. Taste and salt/pepper as necessary (or even more cheese!). Stir over low heat for just a minute or two more, then serve warm :)

PS - this was about the 10th time I tried making a broccoli cheese soup, each previous time being a total disaster, even when following someones recipe - grainy, too watery, cheese doesn't melt well, not broccoli enough, not cheesy enough and on and on. I finally figured out that simple is best, cheddar cheese is best, flour and milk are essential to get the right texture, and using pre-shredded cheese will result in a horrible grainy disgusting mess. You know, just to keep it real. But hey, I am learning!

Friday, November 6, 2009

Apple & Maple Pulled Pork

I grew up eating BBQ pulled pork sandwiches, but it wasn't until I lived in Hawaii and met the joy that is Kalua pig, that I really came to understand what a wonderful thing pulled pork is. Even with very little extra seasoning, the marbled and tender pork butt will just fall apart and have a delicious flavor all its own.


In this case however, the seasoning is pure Autumn goodness - but in a way that is not limited to the season. A single apple, a bit of pure maple syrup, and just a tad bit of chilies gives this a sweet but slightly spicy flavor. The final result is tender and juicy, but not watery or overly sticky. Its full of flavor without being full of fat or sugar.

Pulled pork is such a simple concept that can be done in so many different ways, too. Its great for a barbecue or for a quick weeknight meal or even for a dinner party. It goes great with cabbage (another one of my favorite cheap ingredients), or rice, on a bun or with potatoes. Its easy, stupidly cheap, and extremely difficult to mess up. Of course, that is my favorite part about it. Its like a guaranteed win every time. I love making it for parties because I can prepare everything the day before and put it in the fridge, then, four hours before the party I stick it in the oven and go about the rest of my preparations. Its also great for making ahead then freezing in individual sized portions for quick sandwiches or as an add-in for recipes later on.

Maple & Apple Pulled Pork
3 lbs pork shoulder/butt (in Germany: around 900 grams Schweinerollebraten aus der schulter and remove the netting from the outside, or some butchers carry large portions of schweineschulter)
1 cup apple cider vinegar
about 4 Tbs Canadian Steak Seasoning
1/2 tsp dry ground mustard
1/2 tsp ground Paprika
2 cloves garlic, pressed
1/2 cup diced red onion
1 Tbs diced roasted green chilis (I use the Ortega brand...something I bring from the US - in Germany could use some diced up Pepperoni's maybe, or even Jalapeno) (can use more if you really want some spiciness, I just wanted a hint of spice)
1/4 cup pure Maple Syrup
1 medium apple, peeled & cored and sliced into rings

Place the pork into a dutch oven and pour in the apple cider vinegar. Add the dry spiced, garlic, onion and chilies. Drizzle the Maple syrup over then top with apple slices.

Cover and cook for 4 to 4 1/2 hours (until meat is soft and falling apart) in a 375 F (190 C) oven. About half way through the cooking time check on it and stir it up/break the meat apart a bit and I find this helps in coaxing into the 'pulled' status. I also will do this once about 30 minutes before it finishes (and lets be honest i might just drizzle a bit more maple syrup at this point too. If your meat seems way dry or bland you can put in a bit more apple cider vinegar and spices as well). You could also do this in a slow cooker on low for around 8 hours.

The apples and onions etc will kind of just melt into the meat. When you remove from oven break apart/ stir with a large fork or spoon until it becomes a nice pulled apart consistency and everything is mixed together nicely.

Serve on rolls with rotkohl or cole slaw (kraut salat) or just as is (maybe with some steamed rice, mashed potatoes or polenta).
Related Posts Plugin for WordPress, Blogger...